
Microscopy Basics
This introduction to imaging will outline a number of important concepts from the world of microscopy. From cameras to filters to the microscopes themselves, go back to basics with the fundamentals of microscopy and imaging.
Microscopes are an essential tool in scientific research, allowing the visualization and acquisition of images smaller than the human eye can see. With a rich history spanning thousands of years, microscopes are still in frequent use today in modern laboratory environments, both for basic imaging and advanced applications that reveal more than ever before.
Read on for the basics!
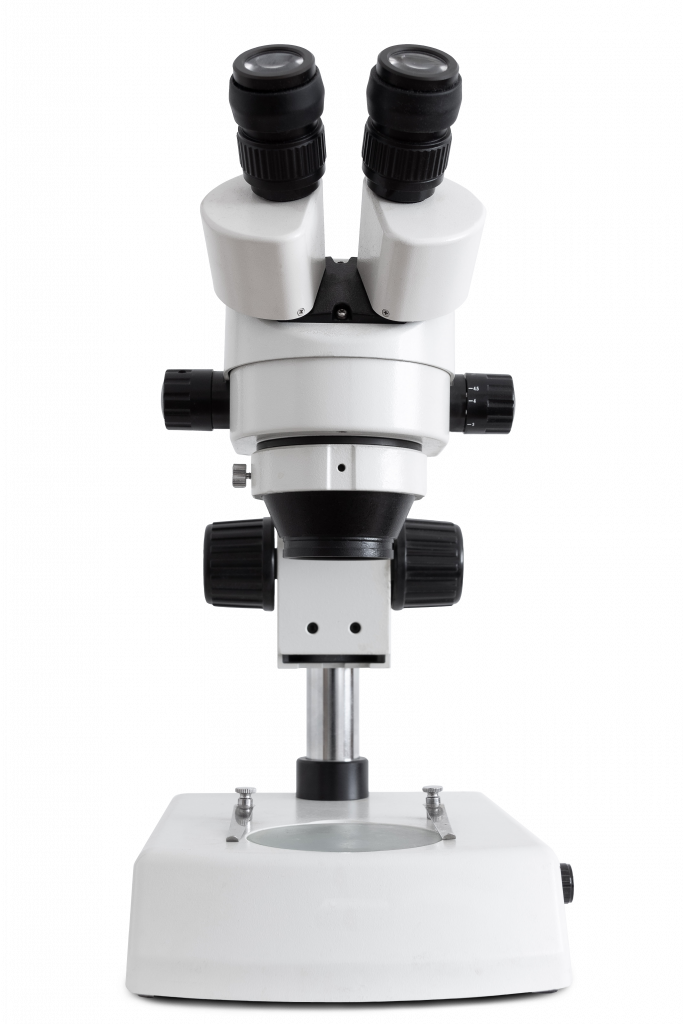
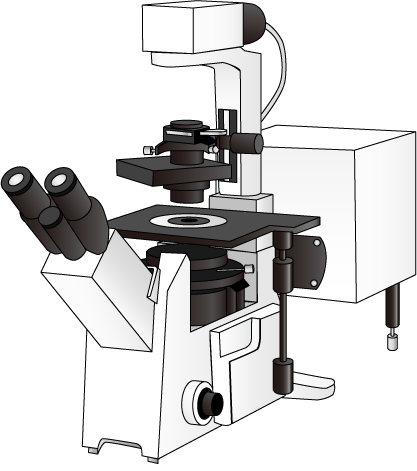
Anatomy Of A Microscope
Microscopes – how do they work? A microscope is essentially a box of lenses and mirrors that bend and direct light through a sample and into your eye. Thanks to the way the light is bent, the image can be magnified, appearing 2, 10 or even 100x larger!
This means that microscopes need to contain a light source, mirrors and lenses to direct the light through a sample, an area for the sample to sit, an eyepiece for users to view the sample through, pathways for cameras to view the sample, and adjustment knobs for focus, alignment, and much more.
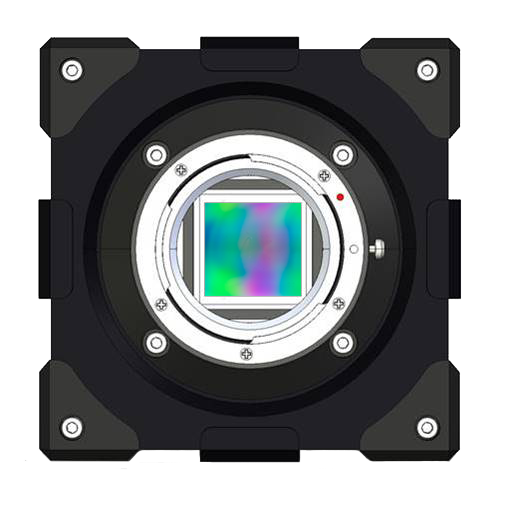
Camera Mounts
The interface between a microscope and a scientific camera is the camera mount, securing the two together so that stable images or videos can be taken of the sample in the microscope. It is vital to match the camera mount to the microscope and camera used, in order to get the most out of an imaging system.
The connection to the camera itself is typically a C-, F- or T-mount, but camera mounts also feature different connections to microscope photo ports depending on the type of microscope and different optics within the mount. As newer technologies develop, camera mounts must remain adaptable in order not to compromise image quality.
Lenses and Optics
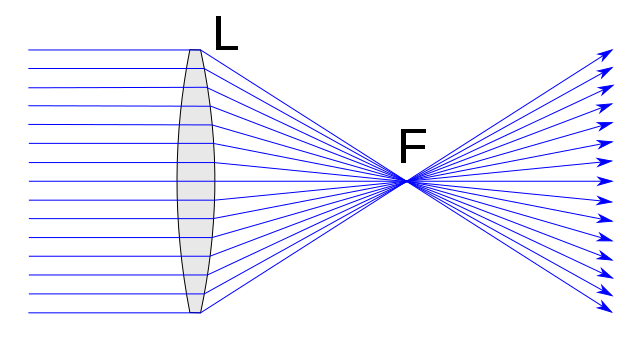
Optics are elements that alter the way that light travels in order to achieve an effect. These effects include reflection, magnification, or focusing of light, typically between the light source and the sample in a microscope.
There are many different types of lenses that can manipulate light in a variety of ways, and modern microscope objectives contain many lenses that are designed with extreme precision, in order to produce consistent effects on a beam of light.
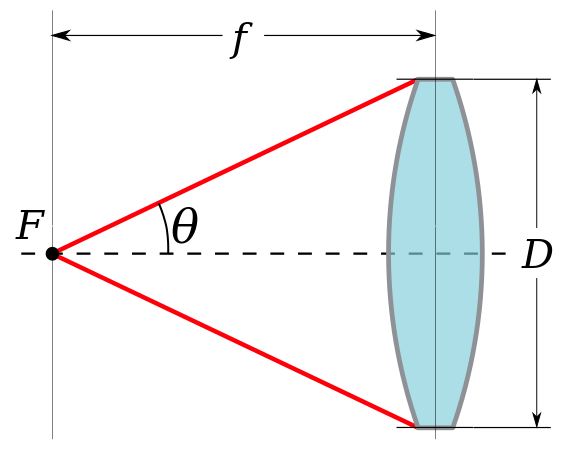
Resolution and NA
The numerical aperture (NA) is related to the angle of light that is emitted from a microscope objective. The greater the angle, the higher the NA and the greater the maximum resolution of the imaging system.
The NA can be increased by imaging in denser mediums, which is why high magnification objectives (60x, 100x) are often oil-immersion lenses, as opposed to air or water lenses. If light spreads out too much before meeting the sample, the resolution of any images acquired will be limited.
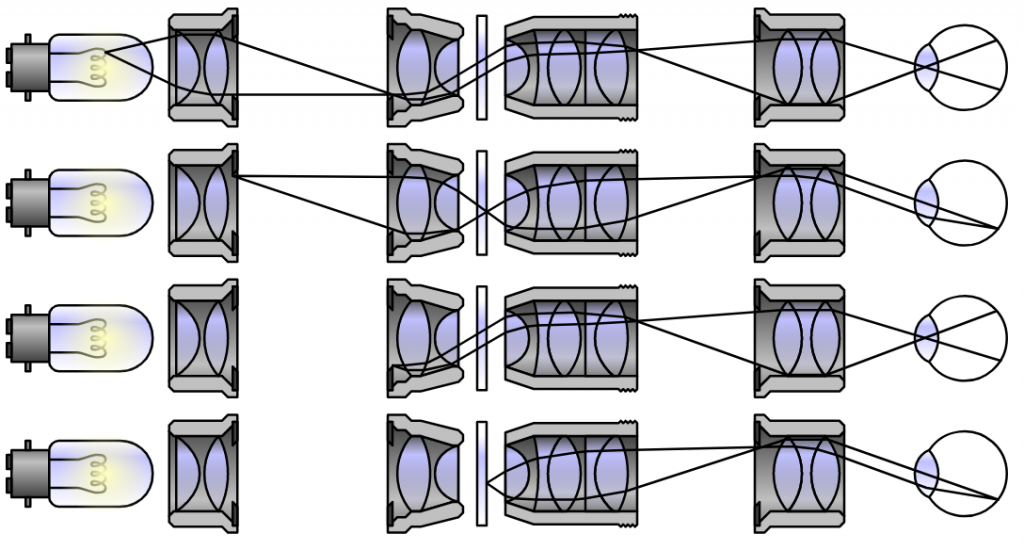
Köhler Illumination
Köhler illumination allows for uniform illumination of a sample, free from structures and patterns regardless of the light source used. Invented by August Köhler in 1893, this technique underlies most of the common illumination methods in microscopy.
Without Köhler illumination, artifacts of the light source (such as lamp filaments) would appear in the final image. While this illumination requires adding some additional elements to the microscope, the result is clear, even illumination and artifact-free images.
Phase-Contrast Microscopy
Standard light microscopy can be limited by low contrast, as most biological samples don’t absorb much light. This can lead to unclear images of transparent specimens and the need to generate more contrast while keeping the sample alive.
Phase-contrast microscopy converts differences in optical pathlengths or the refractive index of the sample into shifts in the phase of light and uses these phase shifts to create contrast. Using only subtle modifications of the regular brightfield optical path, phase contrast permits visualization of details such as intracellular organelles in otherwise featureless, unlabeled samples.

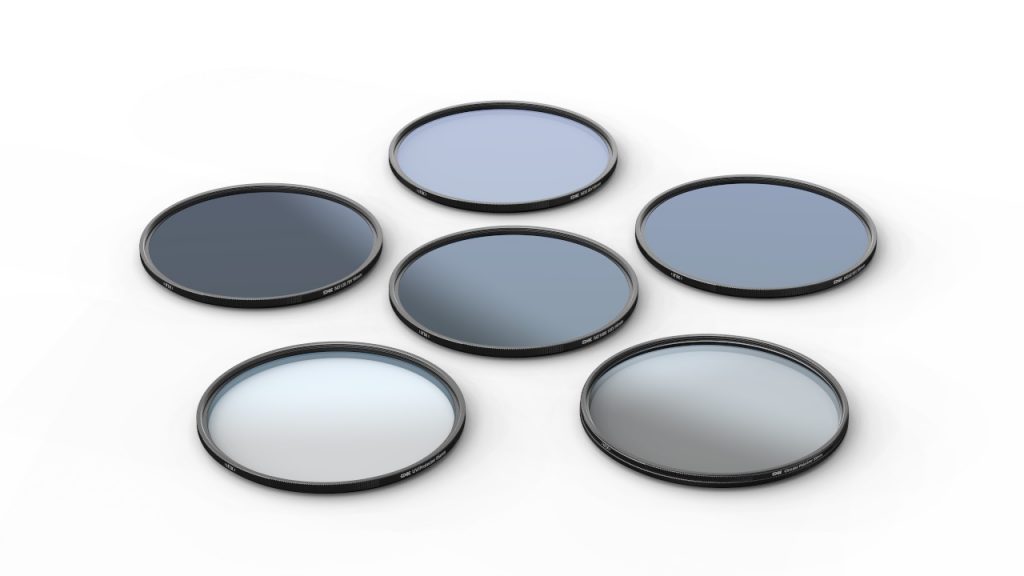
Filters
Light consists of a continuous spectrum of many wavelengths, representing different colors. Including this entire spectrum when imaging can result in artifacts, crosstalk and even photodamage to the sample. In order to prevent this, filters are used to selectively block certain wavelengths and transmit others, allowing for more control in the imaging system.
Filters can increase image contrast, block ambient light, remove UV or IR wavelengths, correct light paths and even reduce the intensity of the light from the source. With a wide variety of filter types and uses, they are widely included with most scientific imaging systems.
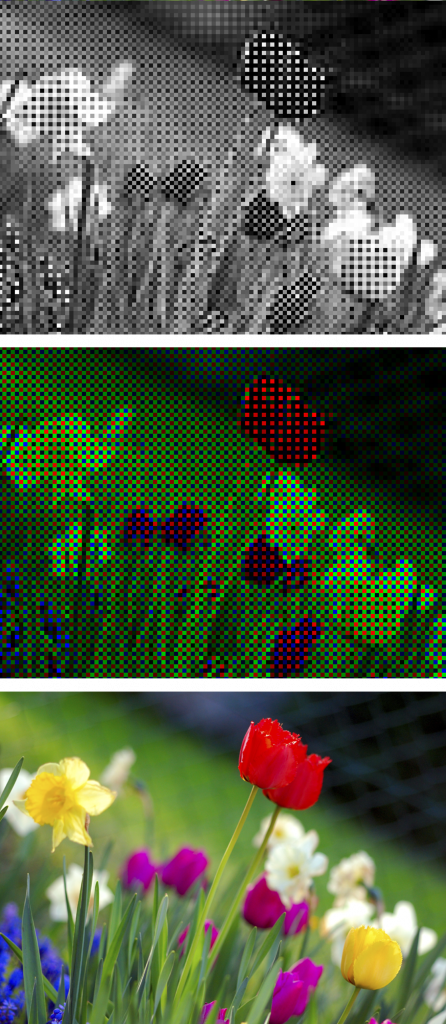
Imaging In Color
Although many entry-level cameras (phone cameras, digital cameras, etc.) can produce color images, a large portion of scientific research is carried out with monochrome cameras which can only quantitatively measure the intensity of light and not the color, resulting in greyscale images that are digitally given ‘false color’ after acquisition.
However, there are scientific color cameras available, often used in areas where color is important such as histology/pathology, where tissue samples are stained with bright colors. These color cameras are typically monochrome cameras with a color filter so that light is split by wavelength into the primary colors of red, green and blue.
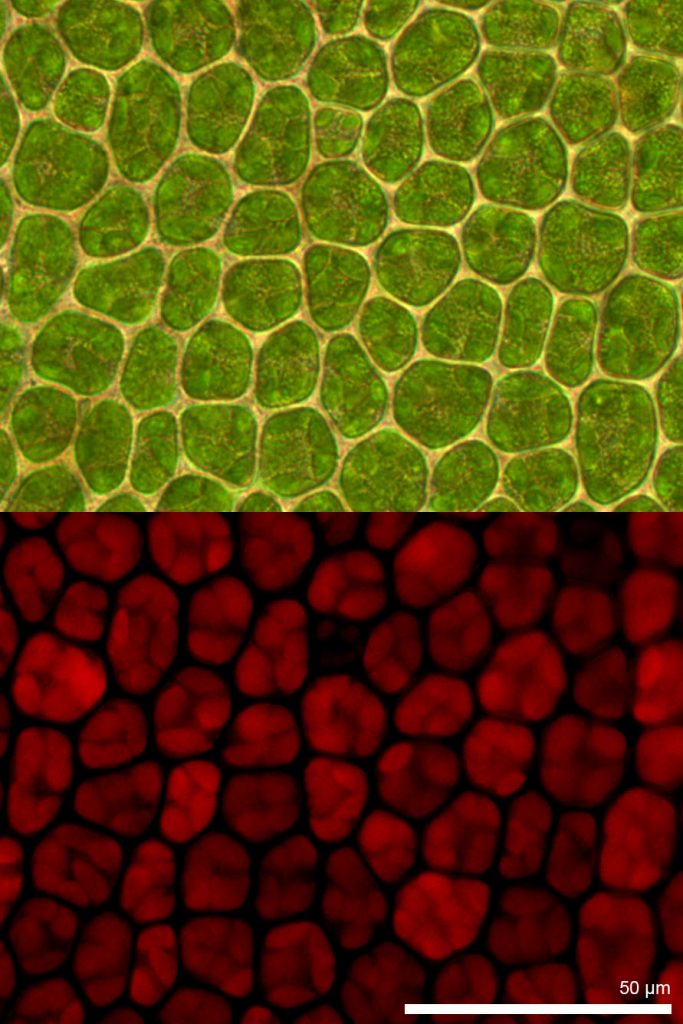
Fluorescence Imaging
Fluorescence is where an object will emit light after absorbing light. Many objects exhibit fluorescence, and certain fluorescent molecules (called fluorophores) are widely used in microscopy to label samples with a variety of colors, including proteins such as green fluorescent protein (GFP).
A sample is labeled with a fluorophore, and a light source is used to excite the fluorophore, which then gives off fluorescent emission light. By using fluorophores to label specific proteins within cells, fluorescence imaging has become a powerful tool for life sciences.
GFP
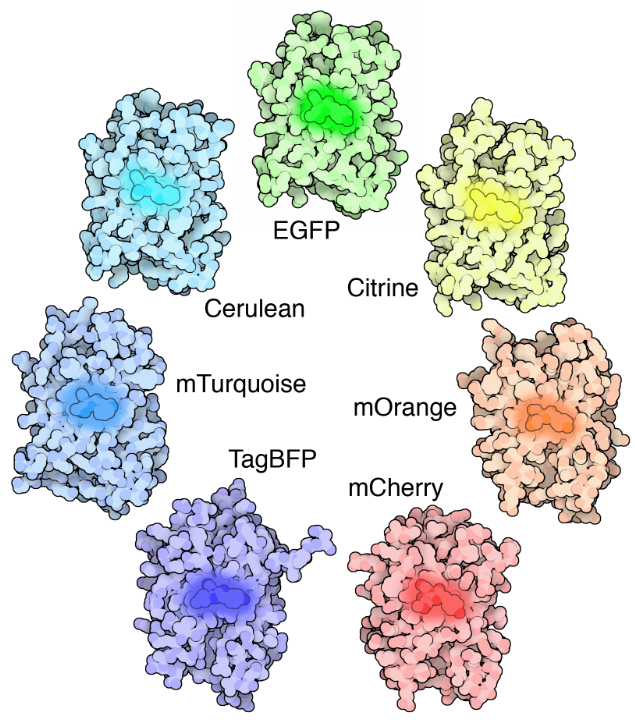
In the 1960’s, one of the most important discoveries in fluorescent microscopy was made inside a jellyfish, Aequorea victoria. The study of this jellyfish lead to the isolation of green fluorescent protein (GFP), a protein that contains a chromophore that is excited by blue light and emits green light.
The nature of GFP and its many uses in scientific research makes it incredibly versatile for fluorescent imaging, be it for live-cell fluorescence, toxicity studies, or fusing GFP to other proteins for fluorescent imaging. GFP has even been modified into other colors, creating a whole family of fluorescent proteins.
Widefield Microscopy
Most microscope techniques where the entire sample is illuminated by the light source are known as ‘widefield’ techniques. This makes widefield microscopy the counterpart to confocal microscopy, where pinholes are used to block most of the light to and from the sample.
This article will discuss widefield imaging and the most widely-used widefield techniques in microscopy, including brightfield, phase-contrast and widefield fluorescence microscopy.